| Assignments | Hints and Extra Credit | Outputs | Requirements |
ActiveX controls can have an
About property at the top of the Properties window
as shown in the following illustration.
To add an About box to your control
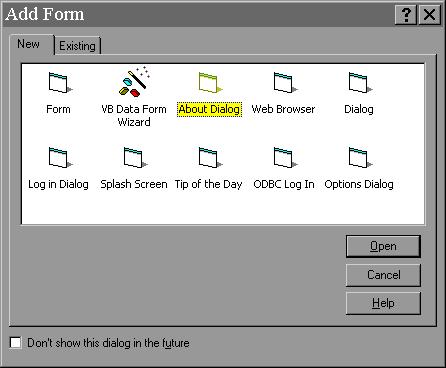
1. Add an About Dialog form similar to the one listed below to the ActiveX project not the program to test it !
Steps: Click the Add Form Button
on the Visual Basic toolbar. Then double-click the About Dialog icon as highlighted in yellow in the dialog box below.
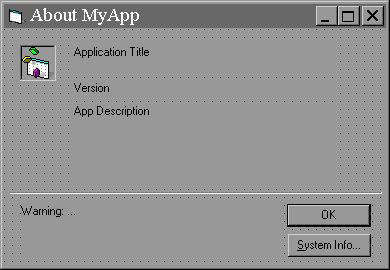
The following dialog box will be displayed.
Change the Captions of the four labels in the About Form above using code by changing the statements in the Form_Load event to explain the purpose and the properties of the newly created ActiveX control. Change the Picture property of the PictureBox control
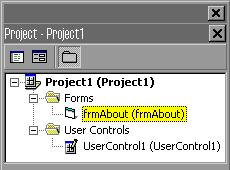
if appropriate, and also the Icon property of the About Form. Remember to change the Caption property of the form! The Project Window should now look like the following diagram.
2. Create a public procedure
in the control class to display the form. Since the procedure is public
the code is placed in the General section of your code window for the UserControl1
form, not your newly created About form! Double-click
on the UserControl1 Icon in the above diagram to make the
UserControl1 form the Active Window. Click the View
Code icon
![]() in the Project Window,
then click
on General in the object drop-down
list in the code window and type in the code listed
in red below.
in the Project Window,
then click
on General in the object drop-down
list in the code window and type in the code listed
in red below.
The following example code displays the About Dialog form for your ActiveX control:
Public Sub ShowAbout()
frmAbout.Show vbModal
Unload frmAbout
Set frmAbout = NothingEnd Sub
3. Assign the public procedure to the AboutBox
procedure attribute of your control class. You must click
the View Code icon
![]() in
the Project
Window first.
in
the Project
Window first.
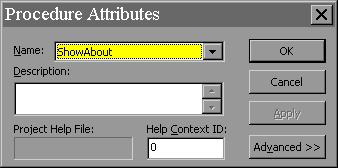
a. On the Tools menu, select Procedure Attributes. The following dialog box will be displayed.
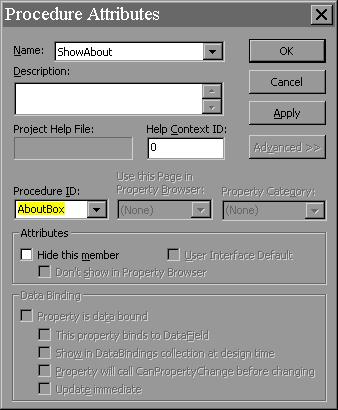
b. In the Procedure Attributes dialog box, select the procedure that displays the About box (ShowAbout), and click Advanced. The following properties will be added to the bottom portion of the dialog box listed above.
c. In the Procedure ID listbox, select AboutBox as shown in the above dialog box, and click
.
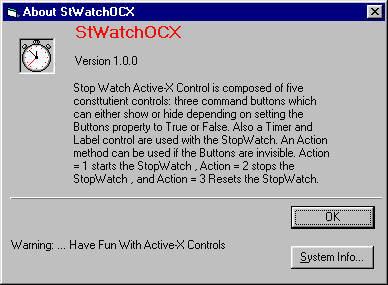
4. To see the for AboutBox for the Active-X control follow the steps below. You must put the Active-X control icon into a New Project first.
a. On the Properties Window, select About Property.
b. In the value area, Click the Build Button
and view the About box that displays
c. Click
You can specify a
custom bitmap to appear in the Visual Basic Control Toolbox, as
shown in the following illustration. The
![]() icon is
a new icon used for the ActiveX control.
icon is
a new icon used for the ActiveX control.
Toolbox bitmaps are 16 by 15 pixels in size. If you specify a bitmap of a different size, it will be scaled to 16 by 15 pixels, which will usually distort the image.
To specify a Toolbox bitmap, set the ToolboxBitmap property of the UserControl object to the bitmap you want displayed for the control.
| Assignments | Hints and Extra Credit | Outputs | Requirements |